A Sensical Concept
CommonSense is a embedded hardware project that I ran within the Connected Embedded Systems Lab under Bob Iannucci at the CMU Silicon Valley Campus. In previous experiments with traffic and environmental sensing, Bob's group found that many of their hardware designs were at least 70% identical, leading to avoidable engineering effort as they redid much of the same work for each new design.
Conceptually, CommonSense was meant to reduce this engineering effort by having one PCB that hosted the application invariants, like the processor, power regulators, basic sensors (e.g., temperature & humidity), and another PCB (potentially multiple) that hosted the application specific hardware, like WiFi radios, SDI-12 transducer interfaces, audio output, etc. The goal was to separate design efforts and reuse as much as possible, including abstractions to help manage communication interfaces and power management.
If this sounds like most other hobbyist-friendly designs like Arduino, BeagleBone, or Raspberry Pi, that's because it is. Even if it doesn't sound like it... it is. However, we aimed to target ultra low-power applications (where a single battery must last months or years) and teach students how to develop these applications. The aforementioned designs are not well optimized for power, which was a major goal for our projects. Libelium has good ultra low-power turnkey solutions for sensors (WaspMotes), but we wanted more than an 8-bit microcontroller, especially since our favorite application was street-mounted sensors running neural nets for vehicle detection and classification.
We came up with a design that included 3+ vertically stacked boards. The 'brain' would be the main CommonSense board, with a solid low-power processor and interfaces galore. The app-specific 'daughter' boards would go on top, containing radios, sensors, and actuators, but would be stackable in any order without interrupting each other; our design allowed for several of these to be used. Finally, the 3rd 'debug' PCB would include power diagnostics and more convenient IO ports.
Design Experiences
I could speak at great length about the CommonSense design and the process — this was my first real hardware design. I'll aim for brevity in describing my experiences and lessons when doing the initial designs.
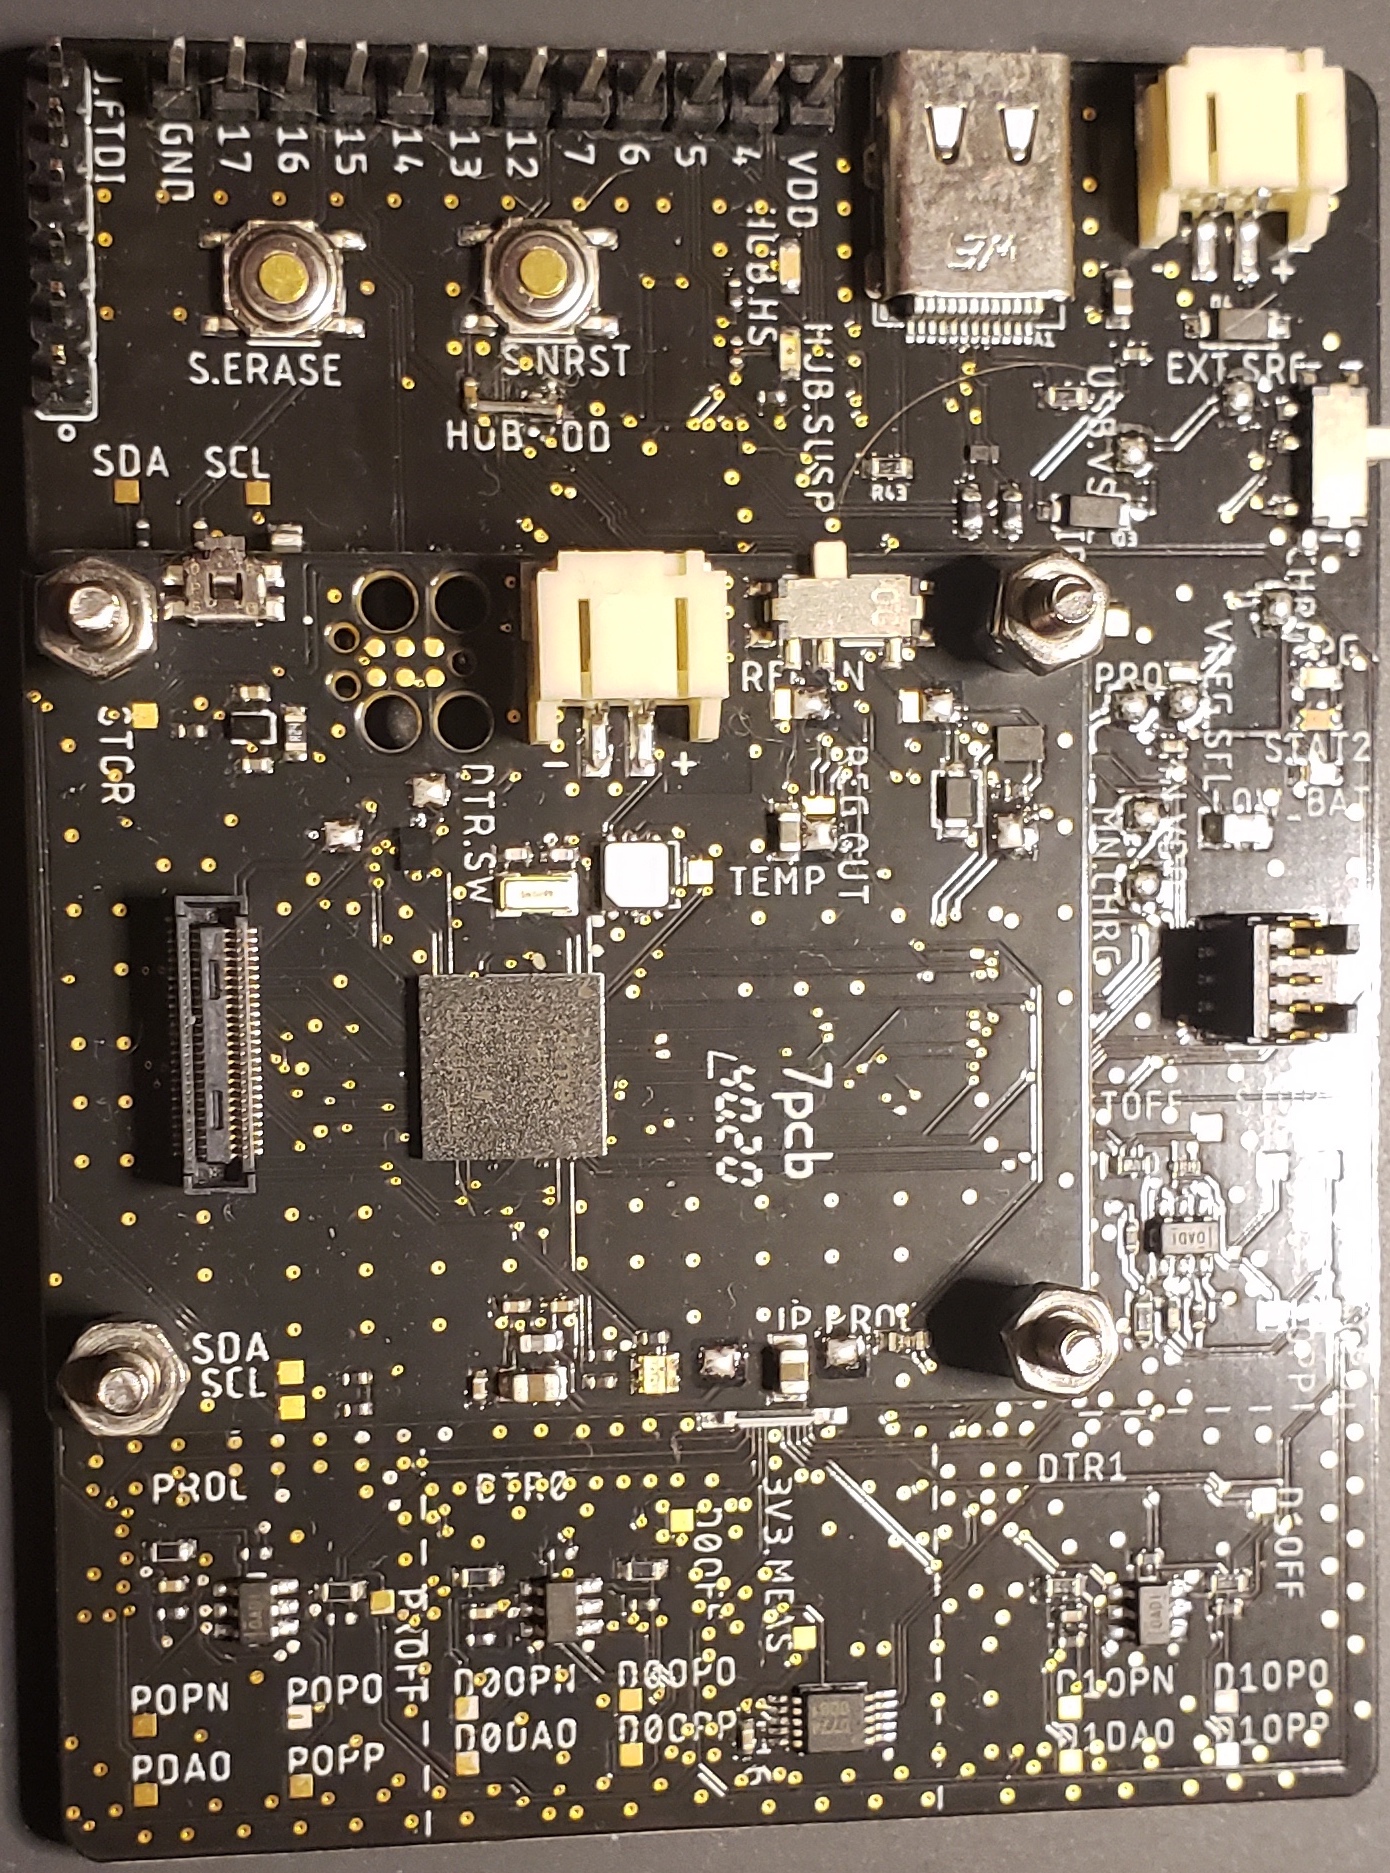
On its own, the main CommonSense board was very simple: voltage input, a regulator, a processor (a Atmel D51 Cortex M4F), a couple of sensors, and external FLASH. Simple.
Yet, the need to interface with multiple app-specific boards meant the interfaces needed much forethought. The D51 processor has a series of 8 reconfigurable serial buses that could switch between SPI, I2C, and USART easily, but not all pins are created equal - this required a great deal of attention (read, finagling) to expose 4 entirely flexible buses to the stacked app-specific cards, 2 for more generic internal use, and 2 to the debugging board.
Another interesting component in this design was to include current sensing such that the attached debug board, based on the PowerDue could apply its high-side current monitoring to each of the 4 voltage rails (processor, storage, and 2 for daughter boards). In reality, this mainly involved including shunt resistors on the main board and connecting a trace from each side to board-to-board interace such they both inputs could be connected to the differential amplifier within the current monitor.
The mechanical mounting was also important to get right in this scenario, since we needed low-pitch (.4mm) mezzanine connectors to pass signals between the main board and the debug/daughter board. We needed low-profile connectors to save space, but these provide poor mechanical stability, so I opted to also allocate space for fasteners. This worked well in practice, but finding small (M2-2.5) screws/standoffs of the right length is surprisingly difficult. The best solution was to use a longer screw and add nonconductive spacers and split washers between boards, topped with a nut on the last board in the stack. Still I would have preferred standoffs but could never find the right height configuration
Altogether, I enjoyed the design phase, in particular, doing PCB layouts since it is much like solving a puzzle. The schematics were fairly easy to make, although the boards were a bit more difficult to lay out, the main board in particular because the BGA-packaged processor had nearly 75 signals routed to two low pitch, 50-pin connectors such that those signals were difficult to escape from the package without a pricey HDI manufacturing setup (the final product was 1.2 x 1.2 inches, 4 layers, no microvias or via-in-pad, though the first version was 1x1, 6 layers with HDI for 4x the price).
Building and Testing
The obvious next stage of the project was having boards produced, assembled, and tested. In total, I did 3 revisions of the main board, 2 of the debug board, and another PhD student in our group did 2 revisions of a daughter board.
In the first version of CommonSense, I hand-populated 2 boards and did basic testing on the processor and power subsystems to ensure it worked. It did, but designing a board with fifty 0402-sized passive components may not have been the wisest decision for someone with limited SMD experience. To be fair, this gave me that experience to aid more complicated rework on this project and others. After that version of the board, we switched the processor to a BGA form factor, at which point hand-assembly was unlikely to bode well. In each version of the board, the basic mode of operation was a complete success — the processor booted and responded to the JTAG interface without issue.
Not everything was perfect, of course. I learned quickly that easily-accessible test points are quite useful for checking voltages at key points in the board, like regulator input/outputs and serial buses. I would later find that to achieve low-power operation, a MOSFET-based power switch used to preferentially power the board via the debug-board connector should not be present — too much static loss for low micro-amp sleep-state! By revision 3, the sleep state current for this main board was down to 35 μA with RAM retention.
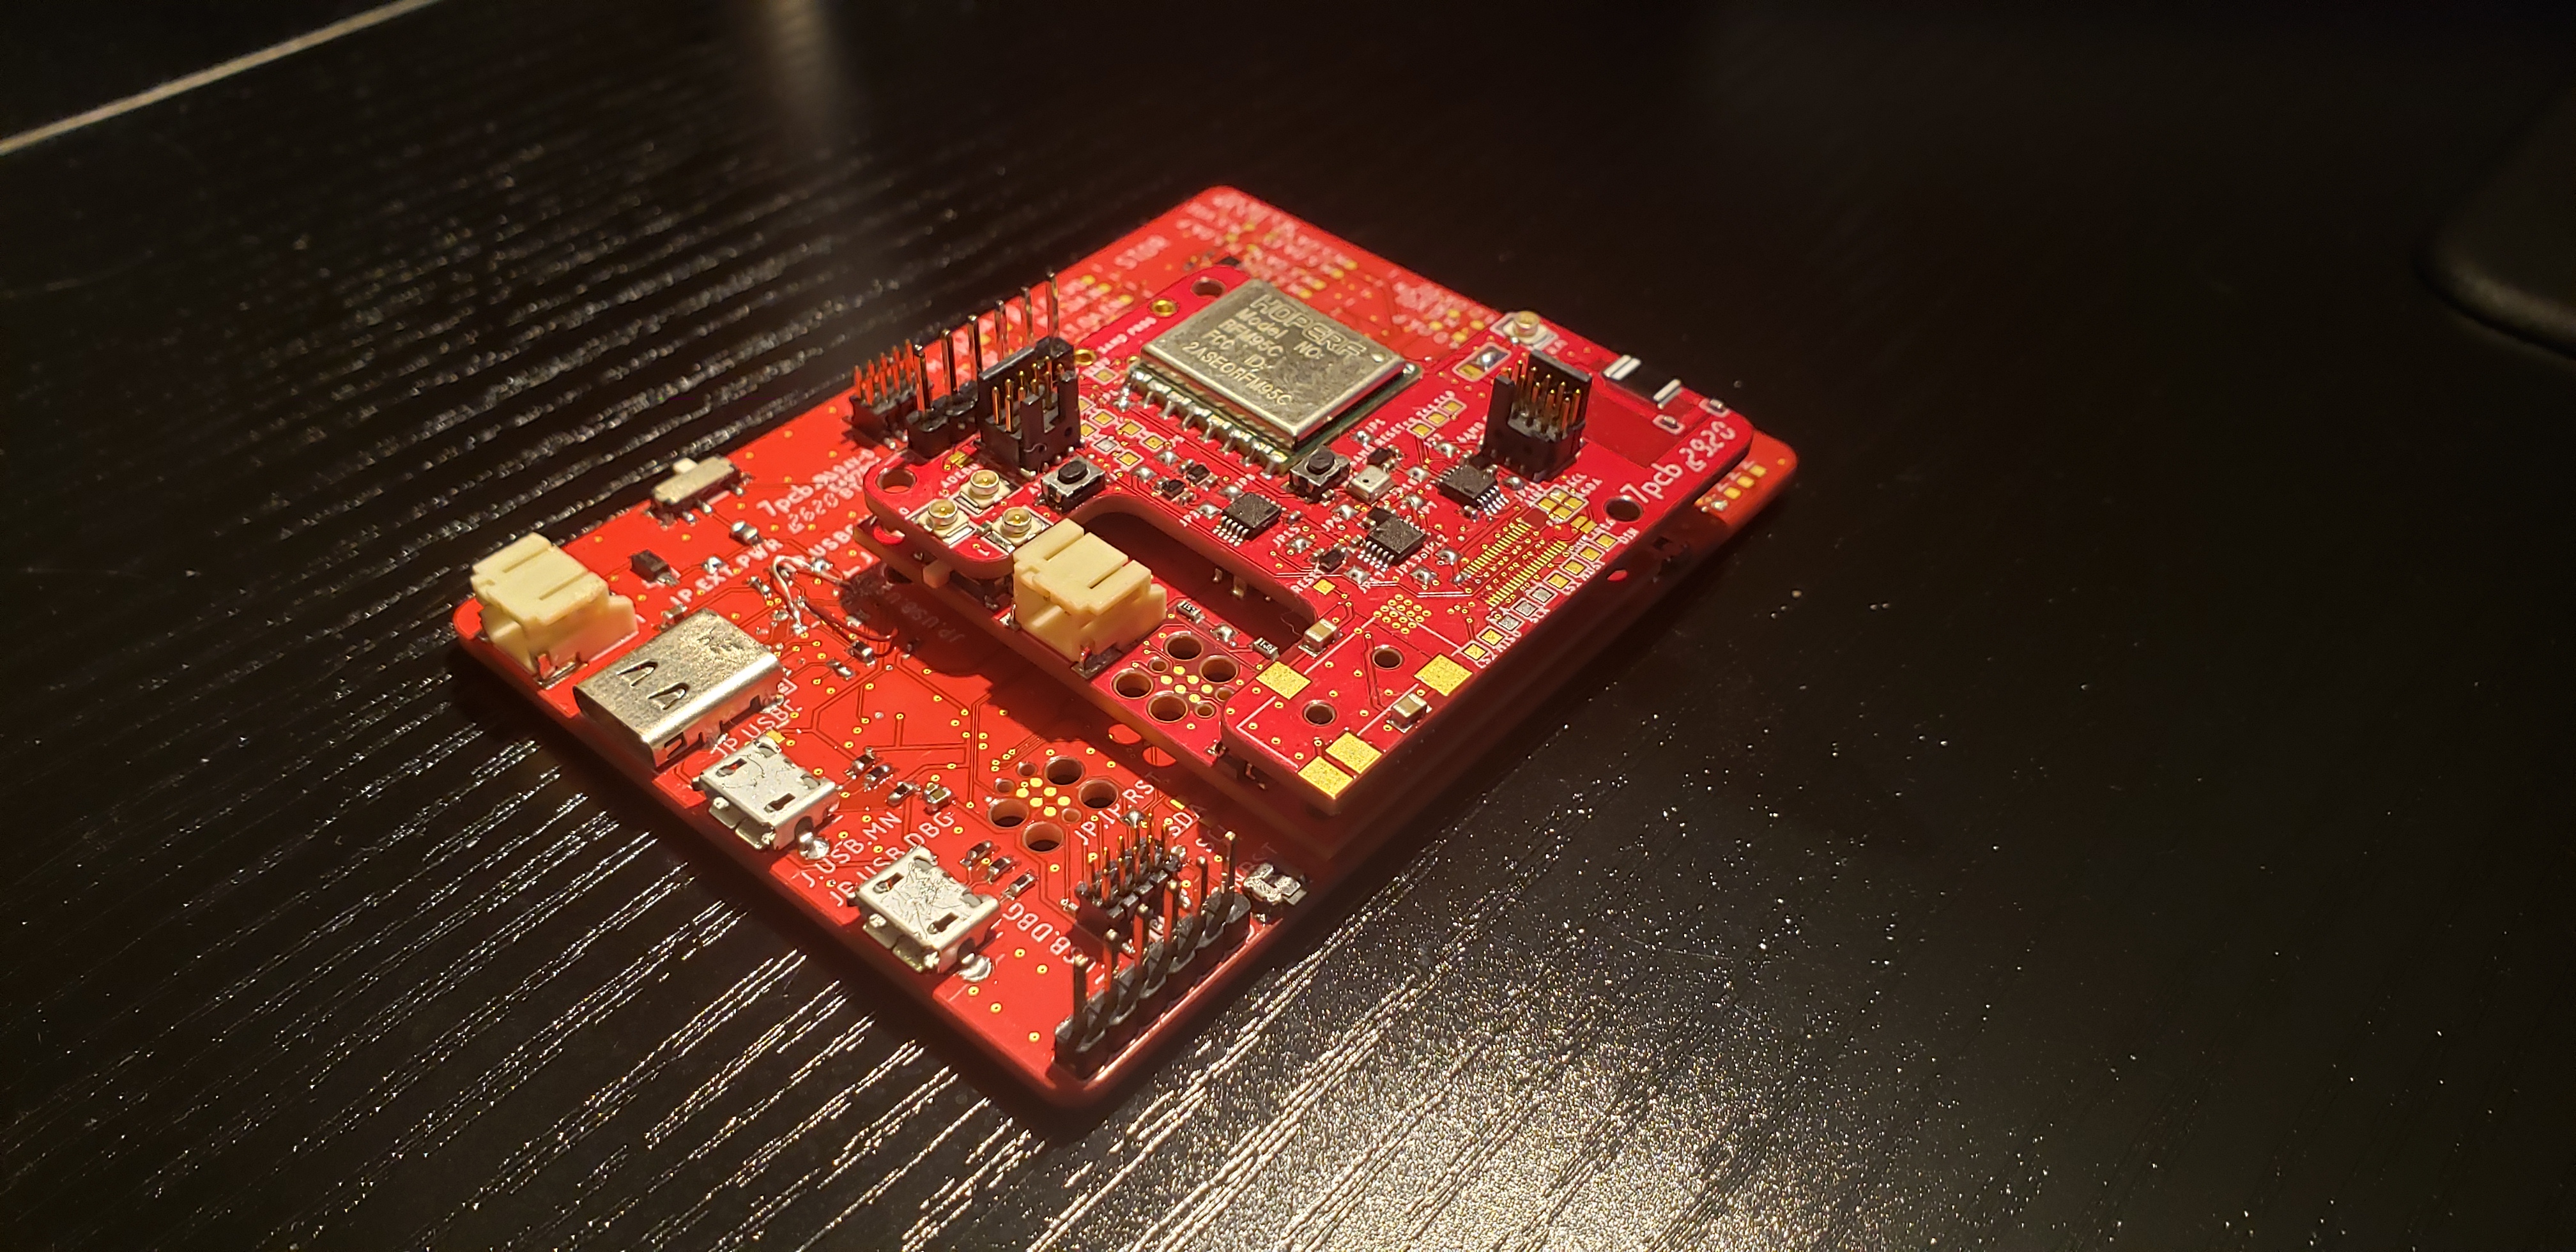
I also hand-populated the first revision of the debug boards, which easily contained over 100 parts. Producing 3 of these without a pick-and-place machine or an oven was very time consuming, but I certainly improved my skills with an iron and a heat gun. This was 3 months into the COVID-19 pandemic, and my kitchen table was converted into an SMD workstation. Some of my prouder moments include building series/parallel resistor chains from 0402s to cover up for my limited supply of parts.
In general, the debug boards worked too, but a few simple errors with missing pull-up/pull-down resistors and swapped D+/D- USB pins drew out the functional tests for the USB hub that split the single USB connection into two for the debug board and main board processors. There was also a fun lesson in the current monitoring hardware import from PowerDue: the debug board (modeled after PowerDue) included 4 high side current monitors to look at power consumption of the main board. The output was read by another microcontroller and sent to a serial port via USB to an interface reminiscent of an o-scope. However, instead of a clean signal showing the expected 20mA in active state, it was a nasty mess; noise everywhere. The problem? The switch-mode (buck-boost) voltage regulator on the main board, whose 200mV pk-pk swings ran at frequencies lower that the cutoff frequency of the low-pass filter ahead of the differential amplifier (dependent on output load, of course). When I swapped to an LDO, the problems vanished. Lesson: switch mode regulators are efficient, but the transients are not negligible for anything analog. I knew this, though my intuition had made me think that since I was looking at an analog signal that was simply the voltage drop across a shunt resistor (a proxy for current), that the transients would be equivalent on each side and effectively cancel out — this is untrue, as capacitance (from components and traces) will change the transient nature of those signals, especially when there is a strong AC element from switch mode regulators.
Since I did not design nor extensively test the daughter boards, I won't speak to that side of this project, but building and testing the hardware I did design was a huge learning experience.
Firmware Framework
With hardware built and tested (at least the obvious bits w.r.t. functionality), the next stage of this project was to design firmware. Part of our goal was to make this hardware and its firmware infrastructure easily accessible and usable for students (a lofty goal). Configuring the build environment can be hassle, to put things lightly. Expensive IDEs for embedded development were out of the question for students. The Visual Studio based Atmel development environment was hardly better (awkward to use, slow interfaces, only worked on Windows; I could go on). We found a good alternative though, which I'll shamelessly plug: PlatformIO (PIO). I'm no development purist — I think IDEs serve a wonderful role, largely due to linting that makes it so easy to refactor code, parse libraries, and simply find what I'm looking for. PIO does a great job of integrating the build environment (configured via python scripts) for microcontrollers into a plugin for popular IDEs, of which I always use VSCode.
Without going too deeply into the details, I configured our build environment using the tools within PIO, which was made much easier by the fact that Adafruit uses the same D51 processor in some of their beefier designs like the Metro M4. Since they extensively support PIO, I was able to reuse a great deal of their configurations to bootstrap my own, including a bootloader (pun intended).
We had a bit of a crossroads w.r.t. how we wanted to design our framework. I had a whole architecture, based out FreeRTOS, thought out for managing key interfaces, memory structures and hierarchies (including a 'see-no-evil, hear-no-evil, speak-no-evil' approach to malloc), power management, network, the whole shebang. A great deal of effort went into this preparation, including extensive documentation to help others join me on the project.
The problem was development time/effort. As a PhD student, I was juggling 2-3 projects, classes, meetings, and my personal wellbeing. There was little excess time with which to implement all of this from scratch — frankly, this was the downfall of the project. Nonetheless, I'll describe a few strategies/ideas I followed in the firmware design and the corresponding pitfalls prior to the project's effective end-to-end.
We knew early on that we wanted to avoid Arduino. I suppose past CCSG lab members found that configuring the interfaces to match Arduino expectations were convoluted and that we could design something better. Perhaps the larger issue was how Arduino, particularly libraries, treats hardware interfaces and memory; we were under the impression that achieving ultra low power operation alongside these libraries would be rife with error, and we probably weren't entirely wrong. We avoided this framework. We wanted to exert more control than that framework, which is designed for hobbyists, would allow.
However, that left us with fewer alternatives than expected. The main one was to use basic drivers from Atmel's tools to cover our bases with low level interfaces. As I would find, this wasn't quite ideal either: their drivers relied heavily on big configuration files that detailed register configurations down to the bit, and these configurations were embedded within the HPL layer's code. The configurations were designed such that a web tool would fill in those fields. This is nightmarish to work with when you want to change those options inline with C, short of rewriting the HPL layer. Which is what I did... at least for a few drivers before I could no longer justify these efforts. I was able to reuse most of the hardware abstraction layer (HAL), but skipped most of what's underneath, i.e., the hardware proxy layer and hardware register interface (HPL & HRI). It worked, but it was admittedly ugly — this formed a few of the basic libraries I wrote for CommonSense, including GPIO configurations, clock configurations, sleep state, USART to printf, and sytem setup.
As I later learned, there was in fact a better approach, which involved using a 'Lite' version of Atmel's drivers. These were more readily configurable within a user program but otherwise implemented all the same functionalities. Unlike the original set of baseline drivers I tried so hard to use, these were actually human readable and they didn't spend 70% of the code size on overprovisioned safety (checking every input down to the bit, locking interrupts for single register read/write). While functions are often useful, I believe there is such a thing as code that is "too" safe.
Unfortunately, I massively reduced by contributions to CommonSense around this time. Complex embedded projects without a specific application in mind or manhours to burn are hard to maintain. I'll share more about that and my opinion on spinning up hardware prototypes for research projects, but first, a success story of CommonSense.
TinyML on CommonSense: The TrafficNNode
Disclaimer: I do not take credit for the bulk of the work within this publication, but I am proud to have seen a hardware project of my design as an integral component of a successful project and publication. Please find the publication here.
In short, CommonSense can run Neural Networks, the current top-dog in machine learning algorithms. In particular, the linked study investigated a recurrent neural network (RNN) for classifying vehicle types and speeds using 3-axis magnetometer data collected from a road mounted sensor. Personally, I would look past the accuracy results. The model was almost certainly overfit: the dataset was too small, and the original was augmented to expand its size but they (someone preceding myself and the other authors; this was beyond our control) augmented before doing a training-test-validation split. I believe this to be data engineering heresy. Again, the absolute accuracy should be ignored, but trends are still notable.
The more important bits are about analyzing the physical characteristics of the underlying signals to optimize the system for long-term, low power operation, such measuring as the maximum frequency component to determine how infrequently the RNN can run and still produce good results. We were happy to find that the RNN could fit and run in real time (execution time in the 10s of microseconds for a single pass on a new sample) on the CommonSense processor. Under ideal circumstances, we estimated several years of operation if the sampling rate, and thus, rate at which the RNN is evaluated, is tuned to match Nyquist's requirements (though I bet we could go lower and still have good classification results). We posed our research contributions as a framework for finding optimizations that would boost the energy efficiency of the system. Unfortunatley, I feel a decent amount of this information was lost in the publication that I linked above due to a page limitation, so those particularly interested can also see the original, longer manuscript
For this project, CommonSense provided a hardware platform with enough resources to run this RNN, as well as good low-power characteristics that allowed us to make the argument that, 'yes, you can run ML at the edge on a battery for years'. The lead on this project, Justin Nguyen, did a fantastic job across the board (pun not intended), including the implementation of several core functions for CommonSense like a filesystem and NOR Flash driver for the external storage. My contributions included introducing him to the hardware and build environment, measuring current draw in various power states, discussing/recommending avenues for contribution (once the RNN's base functionality was demonstrated), and writing/revising the paper alongside Justin.
The (Sad) Lifecycle of Reseach Prototypes
What follows is an honest opinion on research prototypes. Have a good reason to do it and (at least) one, novel application that you absolutely need that prototype for. Building a system with the intention of finding a few use cases for it later is a bad idea. I did this 2-3 times in my two years as a PhD student, and each of those prototypes were dropped after months of development because they either didn't support sufficeintly novel research any better than existing tools or the amount of work outstripped the potential benefit. CommonSense was more of the latter.
I still agree that the base concept of CommonSense is valuable — to my knowledge, there is a lack of ultra-low power, commoditized, extensible hardware platforms with enough compute power to run intensive signal processing, such as a neural net. However, the number of adjectives in the previous sentence relegates this to a very niche space (though I think it will probably expand with time). We could have constructed a few projects within this niche space that could have benefitted from a platform like CommonSense, but it seems to be the unfortunate truth that building the system for research projects is widely considered less valuable than doing something small and niche that no one has conceived before — I suppose that's academic research. Industry research is a different beast that I cannot speak to (yet). The effort of developing CommonSense for general purposes far outstripped the impact. The experience gained in this project was invaluable to me, but it had little tangible contribution to my degree.
I say all this as a warning to those who want to tread the path I did. If you do, get plenty of support (especially personnel), have a very clear goal in mind, and make sure that you find consensus among fellow researchers that the system you to aim to build is necessary to support a novel contribution. Short of that, you'll hear "That sounds like it's just engineering" enough to hear those words bouncing around your cranial cavity as you collapse into bed in the AMs.Sorry, I have a penchent for dramatic hyperbole; just be smart about building systems for academic research